Tag Archives: repurpose
How to Make Little Drawers Out of Tissue Boxes
I recently shared a way to use Kleenex boxes to decorate your home. For that project, I cut the box up to make a photo mat and a decorative votive candle (decoration only).  Continue reading
Decorative Container Ideas
I can’t seem to stop myself from saving these yogurt containers. They are a great size and are so sturdy.

Because we go through so many of them, the growing stack was making me eligible to appear on Hoarders, so I needed to do something with them- and quick.
I didn’t know exactly what to do so I decided to decorate them and then go from there. Since fall is here, I went with a jute wrap.

I also used white yarn for contrast.

I just covered the container with glue (as I went, not all at once) and then just wrapped around.
This is a pretty simple project but I thought I would share. There are actually a lot of things you can do with these containers.
I used a couple to store picnic items.

And filled some with fall mums.

I used some for small random toys. The plastic lids are great, if you remember to save them.


I might still be eligible for Hoarders, I’m not sure. Is it still considered hoarding trash if it’s decorated?
If you enjoy practical and DIY ideas, click the Follow button now so you don’t miss any!
Project Workstation
This project was created out of necessity as I needed an official workstation. My dad had a couple sentimental items in his house that were his mom’s and he kindly let me update and use them.

This table is from his childhood in the forties and I can only assume it was also around long before that. If you ask my dad or any of his siblings, they each have many stories involving this table. It was used to cool cookies and peanut brittle, roll dough, and do homework and other projects.
The table was born to work and I plan to carry on the tradition. I did feel the need to update it though as the vintage, distressed look is normally great, but this table just didn’t have that feel.
While I know that sanding is the ideal first step in a project like this, I was honest with myself from the start. That was not going to happen. So, I went to Lowes and made instant friends with this..

Note the “Sticks to all surfaces without sanding” claim.
I did two coats of it and then painted two final coats of white paint. It’s not perfect but I like it that way.
He also gave me a chair that has been passed around in the family.

I did the same thing to it, two coats of primer and two coats of paint.
I popped out the cushion.

Than I replaced the cushion part with a cutout from a new mattress foam topper that I recently bought but didn’t like. I used two layers of it and covered it with a new fabric by folding it over and then stapled it down.


Then I used a strip of the same fabric and sealed it to the front of the drawer with Mod Podge. Then I (my husband) replaced the handle with an updated one.

I painted the inside of the drawer pale gray just for fun.

Then I found a new home for it.


I love the history of this table and all that was accomplished with it.
I look forward to creating tomorrow’s history with it now.
New Use for Honey Jar (Hand Scrub Holder)

When I came across this honey jar, I immediately had images of visiting a local bee farm, filling it with raw, organic honey, and enjoying it at breakfast. Then I remembered I rarely eat honey, breakfast is usually served in the car, and I’m scared of bees and would never visit their farm.
But the little jar was so cute.
My Aunt Ginny was telling me about a homemade hand scrub she’s been using and I thought this jar would be perfect for that.
There are many different recipes for hand scrubs but I wanted to use what I had on hand. It doesn’t matter exactly what you use as long as you have the two main components: an exfoliant and a moisturizer.

I used salt and olive oil. You can use brown or regular sugar as your exfoliant. Coconut oil would work but it changes consistency depending on the temperature of the room which is why olive oil is nice. Just use what you have on hand.
Mix the ingredients together in your container. I used half salt and half oil. You’ll notice that the oil rises to the top and all the granules are at the bottom. This honey jar is so great because the little dipper stick is always right there to stir it before using. Otherwise, you’ll want to have a stirrer nearby at all times to stir before each use. Just put about a tablespoon in your hand, massage for a minute and rinse. The olive oil may feel a little greasy afterwards so rinse well. I still usually follow with a little lotion.
Place it on your sink for easy access and use everyday.

I didn’t notice until posting this picture that I put the honey jar next to a Burt’s Bees lotion. It must be fate. 🙂
If you enjoy these posts and want the latest to come to your email, click the “Follow” button.

Turn Toys into bathroom décor
Do these baskets of toys look familiar?


It seems like this accumulation of toys is inevitable if you have kids but just seeing these baskets of random pieces and parts makes me crazy.
I wanted to come up with a way to give some of these toys one last run before going from the toy bin to the trash bin.
If your kids have their own bathroom, this is a fun little way to doll it up. (pun intended, I guess.)
Here is my kids’ bathroom before.

Not very exciting.
I just rummaged through their toy baskets for soft, cute toys. Most of them already had hooks.

For the ones that didn’t, I just sewed a loop on the back of the toy with needle and thread.

Then I just hung them through the shower curtain hooks like this..

..and it brought their bathroom to life.
It feels a little toy story-ish in there now, like the dolls are going to start talking to me, but it’s fun.

So, if you’re feeling too sentimental to throw anything away just yet, try giving it a new use for a little while.
~If you enjoy these posts and want them to come right to your email, just click the Follow button.
.
Resurrected Sweater
 awwww, don’t throw out your poor sweater just because it has a hole in it. Rather than end its life, let it start a new life with a quick patch job.
I actually have to credit this project to my husband. I showed him the hole disappointedly and he said (jokingly), “Why don’t you just slap a patch over it?”
I’m sure he wishes I would just laugh at his jokes. Instead, I take them very seriously.
On the bright side, I called him a genius and left him alone for an hour while I worked on this.
Here is the sad state of the sweater before…


First I sewed along the edges of the hole just to clean it up a bit. I don’t know if this was really necessary, but it felt like the right thing to do.

Next, I cut a circle out of red felt just large enough to cover the hole and pinned it in place.
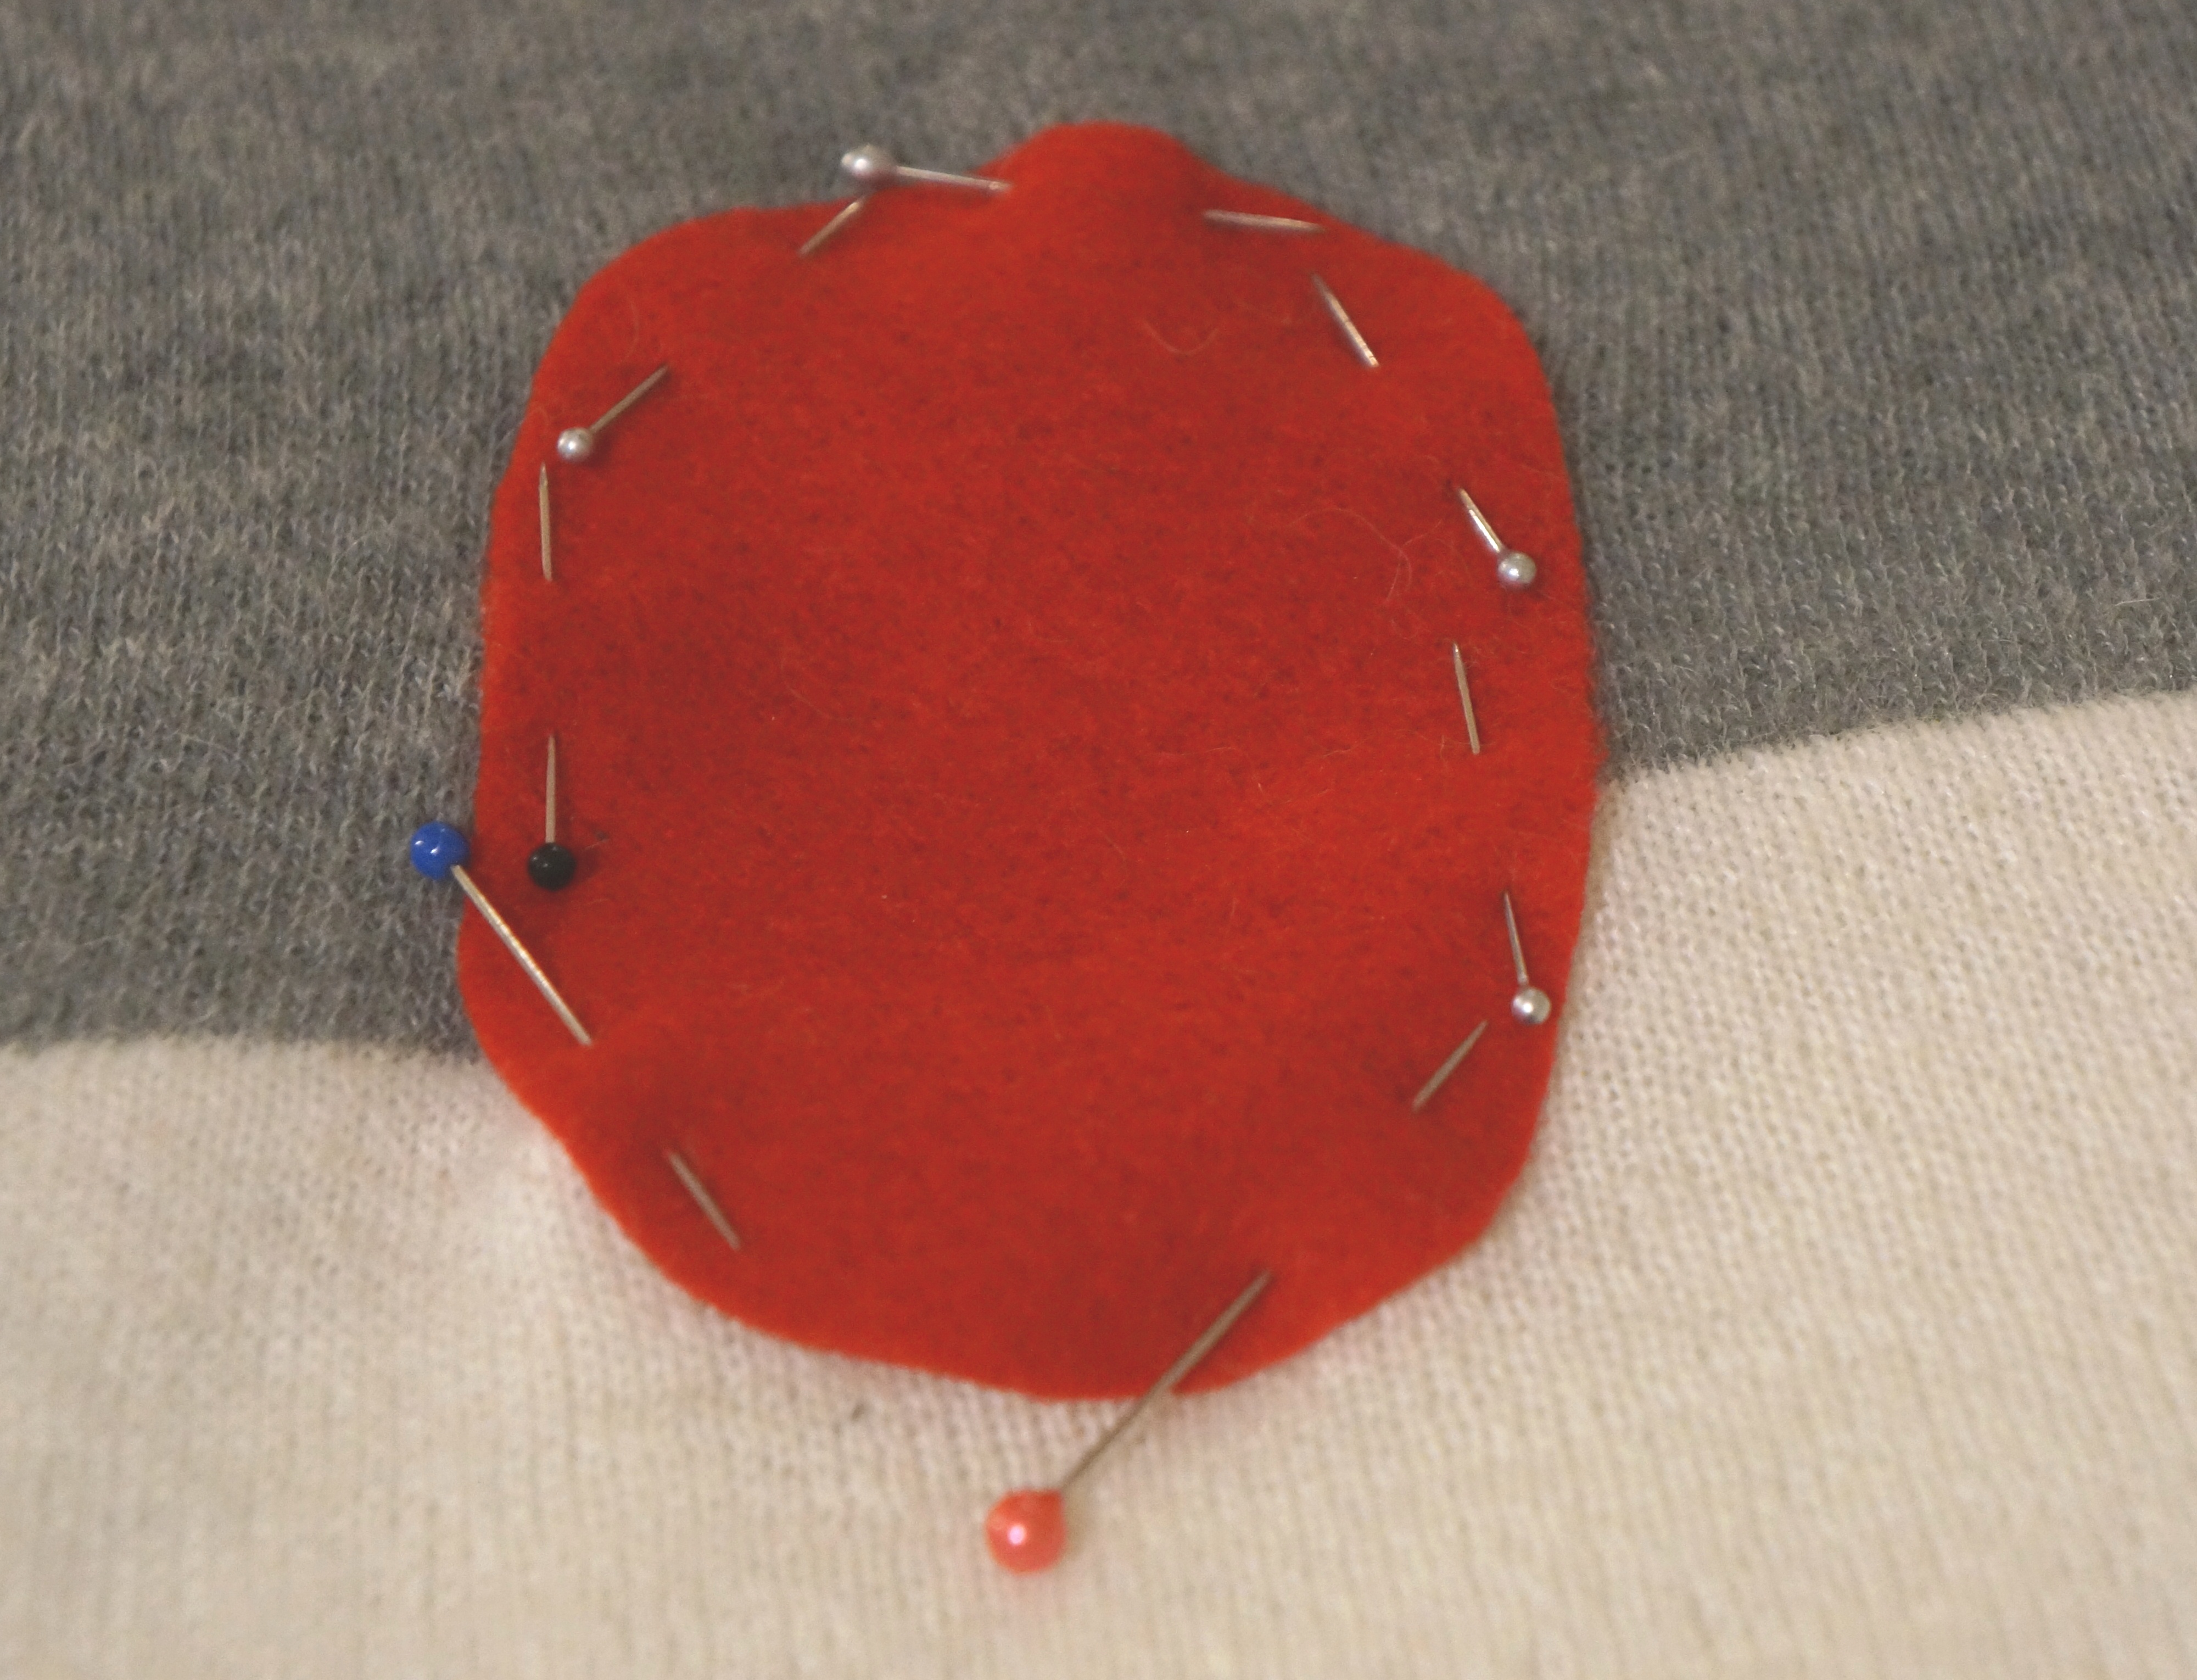
With a zig-zag stitch on my sewing machine, I sewed around the edge of the red patch (twice for good measure) and that was it.


Since the patch is on the back of the sweater, it definitely is a different look, but I like it.
You could also do this with clothes that have a stain that won’t come out. Just cover the stain with a patch and sew it on in the same manner.
Now go grab your Goodwill bag and see what you can resurrect!
If you enjoy these posts and want to receive them in your inbox, click the +follow button now.
